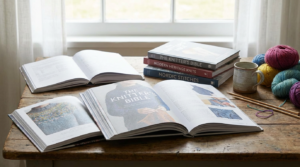
Knitting looks simple on the surface. However, achieving consistent stitches requires attention to detail. One of the most important techniques involves using knitting gauge swatches before starting a project.
Many knitters feel tempted to skip this step. After all, a swatch may seem unnecessary when excitement pushes you to begin. Yet experienced knitters know that swatching saves time, yarn, and frustration.
A gauge swatch allows you to test tension, stitch size, and yarn behavior before committing to a full project. As a result, the finished piece fits correctly and looks polished. Without this preparation, stitches may appear uneven or the final size may change.
Understanding how knitting gauge swatches work will help you create smoother stitches and better-looking finished pieces.
Why Gauge Matters for Even Knitting
Gauge refers to the number of stitches and rows within a specific measurement. Most knitting patterns use a four-inch square as the standard reference.
Although patterns provide recommended gauge numbers, every knitter produces stitches differently. Some knitters naturally create tight stitches. Others knit more loosely.
These differences affect the final size and appearance of a project. For example, a sweater knit with tighter stitches may become too small. Meanwhile, loose stitches could produce a larger garment.
Because tension varies, designers include gauge measurements so knitters can match the intended stitch density. By checking knitting gauge swatches, you ensure that your stitches align with the pattern’s expectations.
This small step dramatically increases the chances of a successful project.
How Swatching Helps Achieve Even Stitches
Swatching does more than confirm stitch counts. It also allows your hands to adjust to the yarn, needles, and stitch pattern.
At the start of a project, stitches often appear inconsistent. Muscles need time to settle into a rhythm. By knitting a swatch first, your hands warm up naturally.
During the process, you begin to understand the yarn’s texture and elasticity. Some yarns glide smoothly across needles, while others require more tension control.
Practicing on a swatch lets you refine your technique before beginning the actual project. Consequently, the first rows of the project appear much more uniform.
Because of this warm-up effect, knitting gauge swatches contribute greatly to smoother, more even stitches.
How to Knit an Accurate Gauge Swatch
Creating an accurate swatch requires more than casting on a few stitches. Instead, the swatch should mimic the project as closely as possible.
Start by checking the pattern instructions. Most patterns specify the stitch pattern and needle size used to achieve gauge.
Next, cast on enough stitches to produce a swatch larger than the required measurement. A five-inch square usually works well.
Follow these guidelines:
Cast on extra stitches beyond the four-inch measurement.
Knit using the same stitch pattern listed in the pattern.
Work several inches so the fabric settles naturally.
Bind off loosely so the edges do not distort the swatch.
After finishing, allow the swatch to rest. Many knitters also wash and dry the swatch if the project will be blocked later.
Taking these steps ensures knitting gauge swatches provide accurate and reliable measurements.
Measuring Your Swatch Correctly
Once your swatch is complete, measuring becomes the next important step.
Place the swatch on a flat surface without stretching the fabric. Then position a ruler or gauge tool across the center.
Avoid measuring near the edges. Edge stitches often distort the fabric and may lead to inaccurate numbers.
Count how many stitches fit within four inches horizontally. Next, count the number of rows within the same measurement vertically.
Compare these numbers with the pattern gauge.
If your swatch contains too many stitches within four inches, your knitting tension is tight. Larger needles will help loosen the stitches.
If your swatch contains fewer stitches, the tension is loose. Smaller needles will create denser stitches.
Measuring carefully ensures knitting gauge swatches provide the information needed to adjust tension properly.
Adjusting Needle Size to Match Gauge
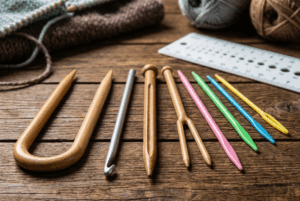
Needle size directly affects stitch size. Therefore, adjusting needles often solves gauge issues quickly.
When stitches appear too small, switching to larger needles helps create more relaxed loops. This change increases stitch size and reduces density.
Conversely, smaller needles tighten stitches. This adjustment increases stitch count within the measured area.
After changing needle size, knit another swatch to confirm the adjustment worked. Even small needle changes can significantly affect gauge.
Testing again ensures the correct tension before beginning the project.
Because of this process, knitting gauge swatches help determine the perfect needle size for your personal knitting style.
Common Swatching Mistakes to Avoid
Although swatching is straightforward, several mistakes can affect accuracy.
One common mistake involves knitting swatches that are too small. A tiny swatch does not provide enough stitches for reliable measurements.
Another mistake occurs when knitters measure without washing the swatch. Many yarns expand or shrink after washing. Therefore, measuring beforehand may produce incorrect results.
Using the wrong stitch pattern also leads to inaccurate gauge. A swatch must match the project’s stitch pattern because textures affect tension.
Avoiding these issues ensures knitting gauge swatches deliver dependable results.
Why Swatching Saves Time
Some knitters avoid swatching because they want to begin the project immediately. Ironically, skipping this step often wastes more time later.
Imagine knitting half a sweater only to discover it will not fit. At that point, unraveling the entire piece becomes necessary.
Swatching prevents these situations by confirming stitch size early. Instead of fixing mistakes later, you adjust tension before starting.
The process usually takes less than thirty minutes. However, it can save hours of work.
For this reason, experienced knitters rely on knitting gauge swatches to avoid major project setbacks.
Testing Yarn Behavior Through Swatches
Yarn behaves differently depending on fiber content and twist. Some yarn stretches significantly, while others remain firm.
A swatch allows you to observe these characteristics before committing to a project.
For example, wool often expands slightly after washing. Cotton, however, tends to relax and grow longer.
By washing and drying the swatch, you can see how the fabric changes. This preview prevents unpleasant surprises once the project is complete.
Because of this testing ability, knitting gauge swatches serve as valuable previews for your finished fabric.
Using Swatches to Practice Stitch Patterns
Many knitting patterns include textured stitches such as cables, lace, or ribbing. Practicing these patterns beforehand helps build confidence.
Swatching allows knitters to learn the rhythm of a stitch pattern. Mistakes become easier to fix before beginning the project.
Additionally, practicing improves stitch consistency. Once the project begins, your hands already understand the pattern flow.
New knitters especially benefit from this preparation. Practicing with knitting gauge swatches reduces errors and builds muscle memory.
How Swatching Improves Knitting Skills
Swatching teaches valuable skills that improve overall knitting quality.
First, it helps knitters understand personal tension. Over time, knitters learn whether they naturally knit tightly or loosely.
Second, swatching builds patience and attention to detail. These habits translate directly into more polished finished projects.
Third, swatching encourages experimentation with yarn and needles. By testing combinations, knitters discover what produces the best fabric.
Through regular practice, knitting gauge swatches become a natural part of the knitting process rather than an extra step.
Conclusion
Knitting success depends on many small details. Among these, gauge remains one of the most important.
By taking time to knit a simple swatch, you gain valuable insight into stitch size, tension, and yarn behavior. This preparation helps ensure the finished project fits correctly and looks professional.
Swatching also improves stitch consistency, strengthens knitting skills, and prevents wasted time. Although the step may seem small, its impact is significant.
With regular practice, knitting gauge swatches become an essential habit for every knitter. When you begin each project with a swatch, you set the foundation for smooth stitches and beautiful finished pieces.
FAQ
1. Why should knitters make a swatch before starting a project?
A swatch helps confirm stitch size and tension. This step ensures the finished project matches the pattern measurements.
2. How big should a knitting test sample be?
Most knitters create a swatch at least five inches wide and tall. This size provides enough stitches for accurate measurement.
3. Should a swatch be washed before measuring gauge?
Yes. Washing reveals how the yarn behaves after blocking, which can slightly change stitch size.
4. What happens if your stitch count does not match the pattern gauge?
You can adjust needle size. Larger needles loosen stitches, while smaller needles tighten them.
5. Do experienced knitters still make swatches?
Absolutely. Even advanced knitters rely on swatching to ensure correct sizing and consistent fabric in their projects.