Welcome to the wonderful world of knitting! Every beautiful scarf, cozy blanket, or intricate sweater begins with a single, crucial step: casting on. For many beginners, this initial technique can feel a little daunting. However, mastering the beginner knitting cast on is easier than you think. This guide will walk you through the essential long-tail cast on method, providing clear, step-by-step instructions to help you confidently start your knitting journey.
Why the Long-Tail Cast On is Perfect for Beginners
The long-tail cast on is a favorite among knitters for several excellent reasons. It creates a neat, stretchy, and professional-looking edge that’s ideal for a wide variety of projects. Unlike some other methods, it establishes both your first row of stitches and a sturdy foundation all at once. Therefore, it is efficient and incredibly practical for those just starting out. Plus, once you get the hang of it, it’s quite fast and rhythmic. This method is often recommended as the very first cast-on technique to learn because of its versatility and ease of use.
Preparing for Your First Cast On
Before we begin, gather your supplies. You’ll need a pair of knitting needles (straight or circular) and a ball of yarn. For beginners, a medium-weight, light-colored yarn (like a worsted weight in a soft cream or pale blue) is best, as it makes it easier to see your stitches. Avoid very dark or highly textured yarns for your first attempts. Furthermore, ensure your needles are appropriate for your chosen yarn weight. For example, a US size 7 or 8 (4.5 or 5 mm) needle is usually a good starting point for worsted weight yarn.
Step-by-Step Guide: How to Cast On Knitting with the Long-Tail Method
Let’s get those stitches onto your needle! Don’t worry if it feels awkward at first; practice truly makes perfect. This detailed guide will show you exactly how to perform the long-tail cast on.
-
Measure Your Tail: Unwind a length of yarn from your ball. The ‘long tail’ part of this method requires estimating. A good rule of thumb is to allow about an inch of tail for every stitch you plan to cast on. So, for 20 stitches, you’ll need roughly 20 inches, plus a little extra for good measure. For your first practice, don’t worry too much about exact measurements; just ensure you have a generous tail. It’s better to have too much yarn than too little, as running out mid-cast on can be frustrating.
-
Make a Slip Knot: Create a slip knot on your needle. This will be your very first stitch. Place the slip knot onto one of your knitting needles, leaving the tail hanging down and the working yarn (attached to the ball) also hanging down. Ensure the knot is snug but not overly tight. This initial stitch forms the anchor for your entire cast on row.
-
Position Your Hands: Hold the needle with the slip knot in your right hand. Drape the long tail over your left thumb and the working yarn over your left index finger. Secure both strands against your palm with your remaining fingers. Your thumb and index finger should form a ‘V’ shape with the yarn. This specific hand position is crucial for the fluid movement required for the long-tail method.
-
Scoop Under Your Thumb: Bring the needle under the strand of yarn wrapped around your left thumb, moving from bottom to top. This motion creates a loop on your needle. It’s important to keep the tension consistent here.
-
Grab the Index Finger Yarn: Pivot your needle slightly and bring it over the top of the yarn on your left index finger, then scoop under that yarn, pulling it through the loop on your thumb. This action forms the new stitch. Consequently, you will see a stitch forming on your needle.
-
Release and Tighten: Gently release the loop from your left thumb. Give a slight tug on both the working yarn and the tail to tighten the new stitch on your needle. Do not pull too tightly, however, as this can make your edge stiff and difficult to work into later. Repeat steps 3-6 for each subsequent stitch until you have the desired number of stitches on your needle. With practice, this process becomes very smooth and intuitive, making the beginner knitting cast on a breeze.
Troubleshooting Common Cast On Issues
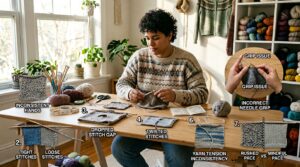
Even experienced knitters sometimes encounter issues. Therefore, don’t be discouraged if your first attempts aren’t perfect. One common problem is stitches that are too tight or too loose. If your stitches are too tight, try using a larger needle size for casting on, or simply relax your grip. Conversely, if they’re too loose, try to maintain a more consistent tension on your yarn. Another issue is running out of tail yarn; in this case, simply untie your work, estimate a longer tail, and start over. Persistence is key, and soon you’ll master this foundational skill.
Exploring Other Cast On Methods for Your Projects
While the long-tail method is excellent for a beginner knitting cast on, many other cast-on techniques exist, each with unique properties. For example, the knitted cast on creates a very sturdy edge, often used for button bands or edgings that need to hold their shape. The cable cast on offers a decorative, firm edge that doesn’t stretch much. As you advance in your knitting journey, you might explore provisional cast ons, which create a temporary edge that can be unraveled later to work stitches in the opposite direction. Each method serves a specific purpose, adding to your versatility as a knitter. For more advanced tools to help with complex projects, consider exploring essential advanced crafting tools.
Choosing the Right Yarn and Needles for Your First Project
Selecting appropriate materials significantly impacts your learning experience. For a beginner knitting cast on, as mentioned, medium-weight, light-colored yarn is ideal. Wool or acrylic blends are good choices because they are forgiving and easy to handle. Avoid slippery yarns like silk or very fuzzy ones like mohair, as these can obscure your stitches. Regarding needles, straight needles are traditional, but circular needles can also be used even for flat projects. They distribute the weight of your project more evenly, which can be less strenuous on your wrists. You can learn more about selecting the right tools by understanding choosing the best interchangeable knitting needles.
The Importance of Gauge Swatching
Once you’ve mastered the cast on and your basic knit and purl stitches, gauge swatching becomes an indispensable practice. A gauge swatch is a small sample of fabric knitted with your chosen yarn and needles to determine how many stitches and rows fit into a specific measurement (e.g., 4 inches). This is crucial for ensuring your finished project matches the pattern’s dimensions. In fact, skipping this step is a common reason why projects turn out too big or too small. Therefore, always take the time to knit a swatch, especially for garments or fitted items. Learn more about knitting gauge swatches to ensure your projects are always the right size.
Moving Beyond the Cast On: Your Next Knitting Steps
After successfully completing your beginner knitting cast on, you’re ready for the next exciting steps! The most fundamental stitches are the knit stitch and the purl stitch. With just these two, you can create a vast array of textures and fabrics, from simple garter stitch (all knit rows) to classic stockinette stitch (alternating knit and purl rows). Many beginner patterns, such as scarves or dishcloths, only require these basic stitches. As you gain confidence, you can explore increases, decreases, and simple lace patterns. Remember that knitting is a journey of continuous learning and creativity. You might find inspiration in various knitting and crochet patterns as you progress.
Practice Makes Perfect: Tips for Developing Your Skills
Consistency is key in knitting. Dedicate a small amount of time each day to practice. Start with small, manageable projects that allow you to repeat the cast on and basic stitches. Don’t be afraid to make mistakes; they are part of the learning process. If you notice a mistake, try to fix it, or if it’s too complex, simply unravel your work and start again. This is often called ‘frogging,’ and every knitter does it! Furthermore, watching video tutorials can be incredibly helpful for visualizing techniques. Consider joining a local knitting group or an online community. The support and shared knowledge can greatly enhance your learning. For instance, connecting with others offers many benefits of crafting community.
Caring for Your Hand-Knitted Creations
Once you’ve poured your time and effort into creating beautiful hand-knitted items, proper care is essential to ensure they last. The washing instructions for your finished project depend heavily on the fiber content of your yarn. Wool, for example, often requires hand washing and careful drying to prevent shrinking or felting. Acrylics, on the other hand, are generally machine washable. Always check the yarn label for specific care instructions before you begin your project. Blocking is another important finishing step that can dramatically improve the drape and appearance of your knitted fabric. It involves gently wetting and shaping your finished piece, then allowing it to dry. Read more about the art of blocking to give your projects a professional finish.
The Joy of Creating: Benefits of Knitting
Beyond the practical skill of creating fabric, knitting offers numerous personal benefits. Many people find knitting to be a meditative and calming activity, helping to reduce stress and anxiety. The rhythmic motion of the needles and the focus required can provide a welcome escape from daily worries. Moreover, completing a project provides a wonderful sense of accomplishment and pride. Knitting can also foster creativity, allowing you to choose colors, textures, and patterns that reflect your personal style. It’s truly a rewarding hobby that combines artistry with a tangible outcome. Many crafters find knitting for mental wellness to be a significant benefit.
In conclusion, mastering the beginner knitting cast on, especially the long-tail method, is your gateway to the fulfilling world of knitting. It might take a few tries, but with patience and practice, you will confidently create the foundation for all your future projects. From measuring your tail to positioning your hands and forming each stitch, every step builds towards your success. Remember to choose appropriate yarn and needles, and don’t hesitate to troubleshoot any issues you encounter. As you progress, you’ll discover the vast array of possibilities that knitting offers, bringing joy and creativity into your life. Happy knitting!
FAQ: Getting Started with Knitting
What is the easiest way to start knitting?
The easiest way to begin knitting is by learning the long-tail method for putting stitches on your needle. This technique creates a versatile and sturdy edge, perfect for beginners. Then, focus on mastering the knit stitch and purl stitch. Many simple projects, like scarves, only require these two basic stitches.
How do I choose the right knitting needles for a new project?
Choosing the right knitting needles depends on your yarn weight and the pattern’s recommendations. Generally, thinner yarns require smaller needles, and bulkier yarns need larger ones. For your very first project, a medium-sized needle (like a US 7 or 8) and a worsted-weight yarn are often recommended as they are easy to handle and see. Always check your pattern’s suggested needle size.
How much yarn do I need for casting on?
For the long-tail method, a good rule of thumb is to estimate about one inch of tail yarn for every stitch you plan to put on your needle. So, if your pattern calls for 30 stitches, you’ll need roughly 30 inches of tail, plus a little extra for good measure. It’s always better to have too much tail than too little.
What should my first knitting project be?
Your first knitting project should be something simple that primarily uses the knit stitch or a combination of knit and purl stitches. Excellent choices include a garter stitch scarf, a simple dishcloth, or a basic coaster. These projects allow you to practice your newly learned cast-on and basic stitches without getting overwhelmed by complex shaping or patterns.
Can I use circular needles instead of straight needles for flat knitting?
Yes, absolutely! Circular needles are incredibly versatile and can be used for both knitting in the round and knitting flat projects. Many knitters prefer them even for flat pieces because the weight of the project rests in your lap, which can be more comfortable and reduce strain on your wrists compared to straight needles.