Once you’ve confidently cast on your stitches, the true magic of knitting begins! The next exciting step is to learn knit and purl stitch, the two fundamental building blocks of almost all knitting. These two simple stitches, when combined in various ways, create an astonishing array of textures and fabrics. Mastering them is your passport to crafting everything from a simple garter stitch scarf to complex cables and lace. Therefore, let’s demystify these core techniques and get you knitting with confidence!
The Dynamic Duo: Knit and Purl Stitches
Think of the knit and purl stitches as two sides of the same coin. A knit stitch on one side of your fabric looks like a purl stitch on the other, and vice versa. Understanding this relationship is key to reading your knitting and creating different patterns. Alone, or together, these stitches form the foundation of every knitted garment. Furthermore, knowing how they interact will greatly enhance your ability to follow patterns and even design your own projects.
Mastering the Knit Stitch
The knit stitch is often the first stitch new knitters learn, and for good reason – it’s straightforward and forms a lovely, even fabric when repeated. When every stitch in every row is a knit stitch, you create what’s called ‘garter stitch,’ a reversible, bumpy fabric perfect for scarves and blankets. This simple fabric is an excellent starting point for any beginner. Consequently, many first projects, like dishcloths or simple throws, utilize this basic stitch pattern.
Step-by-Step: How to Knit a Stitch
- Hold Your Needles: Hold the needle with your cast-on stitches in your left hand. Hold the empty needle (your working needle) in your right hand.
- Insert Needle: Insert the tip of your right needle into the first stitch on your left needle, from left to right. The right needle should go behind the left needle.
- Wrap Yarn: Bring your working yarn (the yarn coming from the ball, not the tail) from behind the right needle, over the top, and around, creating a loop on the right needle. Think of it as scooping the yarn.
- Pull Through: Using the tip of your right needle, pull the newly wrapped loop through the stitch on your left needle. You will now have a new loop on your right needle.
- Drop Off: Gently slide the original stitch off your left needle. You’ve just made your first knit stitch!
- Repeat: Continue steps 2-5 for each stitch across the row until all stitches have been worked from the left needle to the right. Then, switch the needle with the stitches back to your left hand and repeat the process for the next row. Remember to maintain consistent tension for even stitches.
Conquering the Purl Stitch
While the knit stitch might feel more intuitive at first, the purl stitch is equally important and creates a distinct texture. When every stitch in every row is a purl stitch, you also get garter stitch, but it looks slightly different due to the way the purl bumps face. When you alternate knit and purl stitches within the same row or between rows, you unlock an incredible range of patterns. For instance, the classic stockinette stitch is created by alternating rows of knit and purl.
Step-by-Step: How to Purl a Stitch
- Hold Your Needles: Again, stitches on the left needle, empty working needle in your right hand. Your working yarn should be in front of your work this time.
- Insert Needle: Insert the tip of your right needle into the first stitch on your left needle, from right to left. The right needle should go in front of the left needle.
- Wrap Yarn: Bring your working yarn from in front of the right needle, over the top, and around, creating a loop on the right needle.
- Pull Through: Using the tip of your right needle, pull the newly wrapped loop through the stitch on your left needle. A new loop will now be on your right needle.
- Drop Off: Gently slide the original stitch off your left needle. Congratulations, you’ve completed your first purl stitch!
- Repeat: Continue steps 2-5 for each stitch across the row. Then, switch the needle with the stitches back to your left hand. Remember to bring your working yarn to the front for purling and to the back for knitting when alternating stitches.
Combining Knit and Purl Stitches: Your First Patterns
Once you are comfortable with both the knit and purl stitches individually, you can begin to combine them. This is where the true creativity of knitting comes into play. Several fundamental patterns rely solely on these two stitches.
Garter Stitch
As mentioned, garter stitch is made by knitting every stitch in every row. It produces a reversible, bumpy fabric that lies flat and is perfect for beginner projects. It’s also very forgiving of slight tension inconsistencies. Many crafters find knitting for mental wellness, and garter stitch is a great way to start.
Stockinette Stitch
Stockinette stitch is perhaps the most recognizable knitted fabric. It’s created by knitting all stitches on one row and purling all stitches on the next row. The result is a smooth, V-shaped texture on the knit side and a bumpy texture on the purl side. However, stockinette stitch tends to curl at the edges, which is a common characteristic to be aware of.
Rib Stitch
Rib stitch is made by alternating knit and purl stitches within the same row, such as K1, P1 (knit one, purl one) or K2, P2 (knit two, purl two). This creates a stretchy, elastic fabric that is perfect for cuffs, hems, and neckbands. Moreover, ribbing helps garments retain their shape. When choosing yarn for seasonal projects, consider how ribbing will affect the final drape and fit.
Seed Stitch
Seed stitch is another lovely texture created by alternating knit and purl stitches, but in a way that creates a bumpy, pebbled fabric. For example, in a K1, P1 seed stitch, you would knit the purl stitches and purl the knit stitches from the previous row. This creates a balanced, reversible fabric that also lies flat. Furthermore, it adds a sophisticated touch to simple designs.
Tips for Success When You Learn Knit and Purl Stitch
Learning new skills takes practice, and knitting is no exception. Here are some tips to help you master these essential stitches:
- Practice Regularly: Consistency is key. Even 15-20 minutes of practice each day will make a significant difference in your progress to learn knit and purl stitch.
- Don’t Be Afraid to Make Mistakes: Everyone makes mistakes. Learning how to identify and fix them is part of the process. In fact, it builds resilience.
- Watch Videos: Visual learners often benefit greatly from watching knitting tutorials. Websites like YouTube offer countless videos demonstrating knit and purl stitches from various angles. For example, the Craft Yarn Council offers excellent beginner resources.
- Use the Right Tools: Comfortable needles and appropriate yarn can make a big difference. Consider trying different needle materials (wood, metal, bamboo) to see what feels best in your hands. Similarly, some crafters prefer interchangeable knitting needles for versatility.
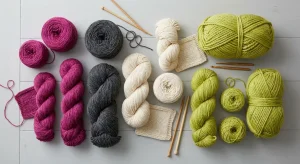
- Start with Simple Yarn: A smooth, light-colored worsted weight yarn is ideal for beginners. Avoid dark colors, fuzzy yarns, or very thin yarns initially, as they can make it harder to see your stitches.
- Check Your Tension: Consistent tension leads to even stitches and a beautiful fabric. Practice holding your yarn in a way that feels comfortable and allows for steady tension.
- Join a Community: Connecting with other knitters can provide support, inspiration, and answers to your questions. Many crafters enjoy the benefits of crafting community.
Beyond the Basics: What’s Next?
Once you confidently learn knit and purl stitch, a whole world of knitting opens up to you. You’ll be ready to tackle more complex patterns and techniques. For example, you can explore cabling, lace knitting, colorwork, and shaping techniques like increases and decreases. You might also want to explore different types of knitting, such as knitting in the round for hats and socks. The journey is truly endless!
Many knitting patterns will assume you are familiar with these basic stitches. Therefore, having a solid grasp of how to form a knit stitch and a purl stitch will make following instructions much easier. As you progress, you might even find yourself interested in designing your own patterns, building upon these foundational elements. The ability to create various textures simply by combining these two stitches is truly remarkable. Learning to knit and purl stitch well is an investment in your crafting future.
Remember that every experienced knitter started exactly where you are now. They all had to learn knit and purl stitch. With patience and practice, you will soon be creating beautiful, handcrafted items. Don’t be discouraged by initial challenges; instead, view them as opportunities to learn and grow. The satisfaction of completing a knitted project, knowing you made every single stitch, is incredibly rewarding. So, pick up your needles, grab some yarn, and enjoy the process of bringing fabric to life with your own hands. You’ll be amazed at what you can achieve when you master these two fundamental stitches. For further inspiration, consider exploring resources like Annie’s Catalog for knitting patterns once you’re ready to apply your new skills.
Ready to Create? Your Journey Starts Now!
Your journey into the wonderful world of knitting truly begins when you confidently learn knit and purl stitch. These aren’t just isolated techniques; they are the rhythmic heart of countless projects. From the simplest washcloth to intricate sweaters, every knitted item is built upon these two foundational movements. Embrace the learning process, enjoy the tactile experience of yarn and needles, and celebrate each stitch you make. Soon, you’ll be effortlessly creating beautiful fabrics and cherished keepsakes. Keep practicing, and you’ll find your rhythm and confidence growing with every row. It’s time to transform yarn into art!
FAQ
What are the fundamental stitches in knitting?
The two fundamental stitches in knitting are the knit stitch and the purl stitch. All other knitting patterns and techniques are built upon variations and combinations of these two basic movements.
How do knit and purl stitches relate to each other?
A knit stitch on one side of your fabric appears as a purl stitch on the other side, and vice versa. They are essentially opposite sides of the same stitch, which is why understanding both is crucial for creating different textures and reading your knitting.
What is garter stitch?
Garter stitch is a knitting fabric created by knitting every stitch in every row. It results in a reversible, bumpy texture that lies flat and is very elastic. It’s often one of the first patterns beginners attempt after learning the basic movements.
What is stockinette stitch?
Stockinette stitch is a common knitting fabric made by alternating rows of knit stitches and purl stitches. Typically, you knit all stitches on one row and purl all stitches on the next. This creates a smooth, V-shaped fabric on the knit side, but it tends to curl at the edges.
What kind of yarn is best for beginners learning knitting basics?
For beginners learning knitting fundamentals, a smooth, light-colored worsted weight yarn is usually recommended. It’s easy to see your stitches, offers good stitch definition, and is comfortable to work with. Avoid very dark, fuzzy, or highly textured yarns initially, as they can obscure your stitches.