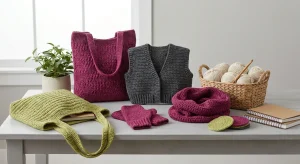
Starting a new craft can feel like learning a new language, full of unfamiliar terms and intricate movements. But don’t worry! At Knit n Style, we believe everyone can learn basic knitting stitches and discover the immense joy and relaxation that knitting offers. This comprehensive guide is designed specifically for absolute beginners, breaking down the essential steps so you can confidently cast on, knit, and cast off your very first project.
Knitting isn’t just a hobby; it’s a pathway to mental wellness. As industry trends show, over 70% of crafters report that their activities help them relax and reduce stress, a testament to the therapeutic benefits of repetitive, creative movements. So, grab some yarn and needles, and let’s begin your journey into the wonderful world of knitting!
Getting Started: Your Essential Knitting Toolkit
Before we dive into the stitches, let’s ensure you have the right tools. You’ll need:
- Knitting Needles: For beginners, straight needles in a medium size (e.g., US 7 or 8 / 4.5 or 5mm) are ideal. Bamboo or wooden needles can be helpful as they provide more grip, preventing stitches from slipping off too easily. You can find more details on selecting the perfect knitting needles on our site.
- Yarn: A smooth, light-colored worsted weight yarn (also known as Aran or 10-ply) is perfect for practicing. Avoid dark or fuzzy yarns, as they can make it difficult to see your stitches. Look for options like organic cotton or recycled blends, aligning with the growing demand for sustainable materials.
- Scissors: For cutting yarn.
- Tapestry Needle: A blunt-tipped needle for weaving in ends.
Casting On: The Foundation of Your Project
Casting on is how you get the initial stitches onto your needle. There are several methods, but the Long-Tail Cast On is popular for its elasticity and clean edge. Here’s how to do it:
The Long-Tail Cast On
1. Measure Your Tail: Unwind yarn from your ball and estimate a length for your tail (about an inch per stitch you plan to cast on, plus a few extra inches). Hold the tail in your left hand and the working yarn (attached to the ball) in your right. Pinch both strands together with your left thumb and index finger.
2. Create a Sling: Bring your left thumb and index finger between the two strands, spreading them apart to form a ‘V’ shape. The yarn from the tail should be around your thumb, and the working yarn around your index finger.
3. Insert Needle: Take your knitting needle and insert it under the strand around your left thumb, going from front to back.
4. Catch Working Yarn: Bring the needle over the strand from your index finger and catch it (yarn over).
5. Pull Through Loop: Pull the yarn you just caught through the loop on your thumb.
6. Release and Tighten: Release the loop from your thumb, pulling gently on the working yarn to tighten the new stitch on the needle. Your first stitch is cast on!
7. Repeat: Bring your thumb back into position to create the ‘V’ again and repeat steps 3-6 until you have the desired number of stitches on your needle. This method is fundamental for anyone hoping to learn basic knitting stitches effectively.
Understanding the Knit Stitch: Your First Basic Stitch
The knit stitch is often the very first stitch a beginner learns, and it’s the building block for many projects. It creates a fabric that looks like a series of ‘V’s. Once you master this, you’ll be well on your way to creating simple garments.
How to Work the Knit Stitch
1. Hold the Needles: Hold the needle with the cast-on stitches in your left hand. Hold the empty needle in your right hand. Ensure the working yarn is coming from the back of your work.
2. Insert Needle: Insert the tip of your right needle into the first stitch on your left needle, from left to right, going through the front loop. The right needle should be behind the left needle.
3. Yarn Over: Wrap the working yarn counter-clockwise around the tip of your right needle. Make sure the yarn goes under the right needle and then over it.
4. Pull Through: Use the tip of your right needle to pull the wrapped yarn through the stitch on your left needle. A new loop will form on your right needle.
5. Drop Off: Gently slide the original stitch off your left needle. The new stitch is now securely on your right needle. Congratulations! You’ve made your first knit stitch.
6. Repeat: Continue working knit stitches across all the stitches on your left needle. When all stitches have been worked, you’ve completed your first row of knitting. Turn your work around so the needle with the stitches is back in your left hand, and begin the next row. Practicing this repeatedly will help you truly grasp how to learn basic knitting stitches.
The Purl Stitch: Adding Texture and Versatility
The purl stitch is the second fundamental stitch in knitting. It creates a fabric that looks like a series of horizontal bumps, and when combined with the knit stitch, it allows you to create a wide variety of textures and patterns, such as stockinette stitch and ribbing. Mastering this will expand your crafting repertoire significantly.
How to Work the Purl Stitch
1. Hold the Needles: Hold the needle with the stitches in your left hand. Hold the empty needle in your right hand. This time, make sure the working yarn is in front of your work.
2. Insert Needle: Insert the tip of your right needle into the first stitch on your left needle, from right to left, going through the front loop. The right needle should be in front of the left needle.
3. Yarn Over: Wrap the working yarn clockwise around the tip of your right needle. The yarn should go over the right needle and then under it.
4. Pull Through: Use the tip of your right needle to pull the wrapped yarn through the stitch on your left needle. A new loop will form on your right needle.
5. Drop Off: Gently slide the original stitch off your left needle. The new stitch is now on your right needle.
6. Repeat: Continue purling across all the stitches on your left needle. After completing the row, turn your work, and you can begin another row. Combining knit and purl stitches allows for much creativity, enabling you to construct different knitting stitches for beginners.
Combining Knit and Purl: Creating Basic Fabrics
Once you understand both the knit and purl stitches, you can start creating various fabric textures. Here are two of the most common and useful combinations:
Stockinette Stitch
Stockinette stitch is perhaps the most recognizable knitted fabric. It features smooth ‘V’s on one side (the “right side”) and bumpy horizontal bars on the other (the “wrong side”).
- To create Stockinette Stitch: Work one row in knit stitches, then turn your work and work the next row in purl stitches. Repeat these two rows. This alternating pattern is essential for many projects.
Garter Stitch
Garter stitch is the simplest fabric to create and is perfect for beginners. Both sides of the fabric look the same, featuring horizontal ridges. It lays flat and doesn’t curl, making it ideal for scarves, washcloths, and blankets.
- To create Garter Stitch: Simply knit every stitch of every row. That’s it! This is often the first fabric many new knitters make as they learn basic knitting stitches.
Casting Off (Binding Off): Finishing Your Project
Casting off, also known as binding off, is the process of removing the stitches from your needle in a way that creates a finished, non-raveling edge. This is the final step in most knitting projects.
How to Cast Off
1. Knit Two Stitches: Knit the first two stitches on your left needle as you normally would. You will now have two stitches on your right needle.
2. Pass First Over Second: Insert your left needle into the first stitch on your right needle (the one furthest from the tip). Lift this stitch up and over the second stitch on your right needle, and then off the tip of the right needle. You now have one stitch remaining on your right needle.
3. Knit One, Pass Over: Knit the next stitch on your left needle. You will again have two stitches on your right needle. Repeat step 2: pass the first stitch over the second and off the needle.
4. Repeat: Continue knitting one stitch and then passing the previous stitch over and off until you have only one stitch left on your right needle and no stitches on your left needle.
5. Cut Yarn and Secure: Cut your working yarn, leaving about a 6-inch tail. Insert your needle into the last remaining stitch, pull the yarn tail completely through the loop, and gently tighten to secure. Your project is now cast off! You have successfully learned how to learn basic knitting stitches from start to finish.
Essential Tips for New Knitters
As you embark on your knitting journey, keep these tips in mind to make your experience more enjoyable and successful:
- Practice Regularly: Consistency is key. Even 15-20 minutes of practice each day can significantly improve your technique and speed.
- Don’t Be Afraid to Make Mistakes: Everyone makes mistakes. Learning to identify and fix them is a crucial part of the process. Sometimes, it means unraveling a few rows, which is perfectly normal.
- Watch Videos: Visual learners often benefit greatly from watching knitting tutorials. Websites like YouTube offer countless free resources for visual learners.
- Join a Community: Connect with other knitters! Online forums, local knitting groups, or even social media communities can provide support, inspiration, and answers to your questions. The crafting community is very welcoming.
- Start Small: Your first projects should be simple, like a garter stitch washcloth or a basic scarf. This allows you to practice the fundamental techniques without getting overwhelmed.
- Choose the Right Yarn and Needles: As mentioned earlier, smooth, light-colored worsted weight yarn and medium-sized bamboo or wooden needles are ideal for beginners. This choice makes it easier to see your stitches and prevents frustration.
- Understand Yarn Weights: Different projects require different yarn weights. Familiarize yourself with common weights like fingering, sport, DK, worsted, and bulky. This knowledge will become invaluable as you explore more complex knitting patterns.
- Manage Tension: Consistent tension is vital for even stitches. It takes practice to develop, so don’t get discouraged if your first few projects have uneven stitches. It gets better with time and practice.
- Learn to Read Patterns: Once you’re comfortable with the basic stitches, understanding how to read knitting patterns will open up a world of possibilities. They provide instructions using abbreviations and symbols.
Learning to knit is a rewarding experience. It takes time and patience, but the satisfaction of creating something with your own hands is immense. Remember, every experienced knitter was once a beginner. Keep practicing, stay curious, and most importantly, enjoy the process!
Beyond the Basics: Your Next Steps
Once you are comfortable with casting on, knitting, purling, and casting off, you might wonder what’s next. The world of knitting is vast and exciting!
- Explore Different Stitches: Try combinations of knit and purl to create ribbing, seed stitch, or moss stitch.
- Learn to Increase and Decrease: These techniques are crucial for shaping your knitted fabric, allowing you to create garments, hats, and more.
- Work in the Round: Using circular needles or double-pointed needles, you can knit seamless tubes, which are perfect for socks, hats, and sweaters.
- Experiment with Colorwork: Intarsia and Fair Isle are techniques that allow you to incorporate multiple colors into your projects, creating stunning designs.
- Try New Yarns: Explore different fiber types (wool, cotton, alpaca, silk) and yarn weights. Each has unique properties that affect the look and feel of your finished project. For instance, understanding Red Heart yarn can be a good starting point for exploring different brands.
- Tackle Your First Project: Maybe it’s a simple scarf, a washcloth, or even a basic baby blanket. Choose something small and manageable to build your confidence.
The journey of knitting is continuous learning. There are always new techniques, stitches, and patterns to discover. Knit n Style is here to support you every step of the way, providing resources to help you grow from a beginner to an accomplished crafter. We encourage you to keep exploring and enjoying the creative process. For more insights on the broader craft world, consider exploring resources like the Craft Yarn Council for industry standards and information.
Conclusion
Congratulations on taking your first steps to learn basic knitting stitches! You’ve learned how to cast on, master the foundational knit and purl stitches, and cast off your work. These are the essential building blocks for nearly every knitting project you’ll ever undertake. Remember that patience and practice are your best friends in this journey. Don’t be discouraged by initial imperfections; every stitch is a step closer to becoming a confident knitter. Embrace the process, enjoy the meditative rhythm of the needles, and revel in the satisfaction of creating something beautiful with your own hands. Happy knitting!
FAQ
What are the absolute essential knitting stitches for beginners?
For absolute beginners, the most essential stitches to master are the knit stitch and the purl stitch. With these two, you can create garter stitch, stockinette stitch, and many other basic fabric textures. Learning these foundational techniques will set you up for success in almost any project.
How long does it typically take to learn the fundamentals of knitting?
The time it takes to grasp the fundamentals varies for everyone. Most people can comfortably learn to cast on, knit, purl, and cast off within a few hours of dedicated practice. However, developing smooth tension and consistent stitches takes more time, often weeks or months of regular practice. Patience is key!
What kind of yarn and needles should a beginner use to start knitting?
Beginners should ideally use smooth, light-colored worsted weight yarn and medium-sized knitting needles (US 7 or 8 / 4.5 or 5mm). Bamboo or wooden needles are often recommended as they provide more grip, which helps prevent stitches from slipping off too easily. Avoid dark or fuzzy yarns as they can obscure your stitches.
Are there any common mistakes new knitters make and how can they be avoided?
Common mistakes include inconsistent tension, dropping stitches, and twisting stitches. Inconsistent tension can be improved with practice. Dropped stitches can often be picked up with a crochet hook. Twisting stitches usually happens by inserting the needle incorrectly; always ensure you’re working into the front or back loop as instructed. Watching video tutorials can be very helpful for visualizing correct technique.
What is the easiest first project for someone who is just starting to knit?
The easiest first project for someone just starting to knit is typically a garter stitch scarf or a simple washcloth. These projects only require you to know how to cast on, knit every stitch, and cast off. They are small, manageable, and allow you to practice your basic skills without getting overwhelmed by complex shaping or patterns.