Welcome to the wonderful world of knitting! If you’ve ever admired a cozy scarf or a beautiful blanket and thought, “I wish I could make that,” you’re in the right place. Starting your knitting journey might seem a little daunting at first, but with our comprehensive beginner knitting guide, you’ll be creating your first stitches in no time. At Knit n Style, we believe everyone can learn to knit, and we’re here to provide all the free resources you need to get started. Many new crafters, especially younger individuals, are discovering the joy and mental wellness benefits of hands-on activities, a trend that’s significantly contributing to the market’s growth, as seen with over 65 million individuals globally engaging in knitting and crochet activities in 2024.
Choosing Your First Supplies: Keeping It Simple
Before you cast on, let’s talk about what you’ll need. Don’t worry, it’s not much! The beauty of knitting is its simplicity in tools. You’ll need yarn and knitting needles. For your very first project, we recommend:
- Yarn: A smooth, light-colored worsted weight (medium) yarn. Avoid dark colors, fuzzy yarns, or very thin/thick yarns initially, as they can make it harder to see your stitches. Opting for organic cotton or recycled fibers can also align with the growing eco-consciousness trend; nearly 49% of yarn manufacturers incorporated recycled fibers or organic materials in 2024.
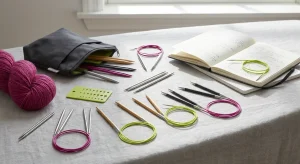
- Needles: A pair of straight knitting needles in a size appropriate for your worsted weight yarn (usually around US size 7 or 8 / 4.5 or 5 mm). Bamboo or wooden needles are often recommended for beginners as they are less slippery than metal, making it easier to control your stitches. You can find more details in our guide on You won’t Get Far with Your Next Project Without the Best Set of Knitting Needles.
Mastering Your First Stitches: The Knit Stitch
Once you have your supplies, you’re ready for the fun part: making fabric! We’ll start with the foundational steps. This Knitting Stitches for Beginners – The Best Place to Start will walk you through.
Step 1: Making a Slip Knot
The slip knot is the very first loop on your needle and acts as the starting point for all your stitches. It’s adjustable and won’t unravel easily.
- Make a loop with your yarn, ensuring the tail end is behind the working yarn.
- Insert your crochet hook or finger into the loop from the front.
- Catch the working yarn (yarn coming from the ball) and pull it through the loop.
- Place the resulting loop onto your knitting needle and gently pull both ends of the yarn to tighten it, but not too tightly. It should slide easily on the needle.
Step 2: Casting On (Long-Tail Cast On)
Casting on creates the initial row of stitches on your needle. The long-tail cast on is a popular and versatile method. Consequently, it’s an excellent choice for those just learning how to knit. First, measure out a “long tail” of yarn. A good rule of thumb is to allow about an inch per stitch you plan to cast on, plus a little extra. Drape this tail over your left thumb and the working yarn over your left index finger, holding both ends in your palm. Then, hold the needle with the slip knot in your right hand. Insert the needle under the yarn on your thumb, then over the yarn on your index finger, and pull it through the loop on your thumb. Drop the loop from your thumb and tighten. Repeat these steps until you have the desired number of stitches. This technique is often favored by many for its sturdy edge.
Understanding Basic Knitting Terminology
As you progress, you’ll encounter various terms. Therefore, understanding them will help you read patterns and follow instructions more easily. Here are a few key terms:
- Working Yarn: The yarn coming directly from the ball.
- Yarn Tail: The short end of the yarn, usually left over from casting on or joining a new ball.
- Gauge: The number of stitches and rows per inch. This is crucial for ensuring your project matches the pattern’s intended size.
- Right Side (RS) / Wrong Side (WS): The right side is the “public” or finished side of your fabric, while the wrong side is the back.
- Skein/Ball: A unit of yarn packaging.
Familiarizing yourself with these terms early on will make your knitting journey smoother. In fact, many experienced knitters still refer to these basics regularly. This foundational knowledge is a core part of any effective beginner knitting guide.
Your First Project: The Garter Stitch Scarf
Now that you know the basics, let’s make something! A simple garter stitch scarf is the perfect first project. It uses only the knit stitch, making it ideal for practicing tension and consistency. Moreover, it’s a practical item you can wear or gift.
Materials Needed:
- One skein of worsted weight yarn (e.g., Red Heart Super Saver, which you can learn more about in A Trusted Yarn for More Than 3/4 of a Century – Red Heart).
- One pair of US size 8 (5 mm) knitting needles.
Instructions:
- Cast On: Using the long-tail cast on method, cast on 20-25 stitches. This width is comfortable for a narrow scarf.
- Knit Every Row: Insert your right needle into the first stitch on your left needle from left to right. Wrap the working yarn counter-clockwise around the right needle. Pull the right needle back through the stitch, bringing a new loop with it. Slide the old stitch off the left needle. Repeat this for every stitch across the row.
- Turn Your Work: Once you’ve knitted all stitches on the left needle, switch the needles so the one with stitches is in your left hand.
- Continue Knitting: Repeat step 2 for every row until your scarf reaches the desired length. For instance, a typical scarf can be 60-70 inches long.
- Bind Off: When your scarf is long enough, it’s time to bind off. Knit two stitches. Insert the left needle into the first knitted stitch on the right needle and lift it over the second stitch and off the needle. You’ve bound off one stitch. Knit another stitch, then repeat the lift-over process. Continue until only one stitch remains. Cut the yarn, leaving a 6-inch tail, and pull it through the last loop to secure.
Congratulations! You’ve completed your first knitted project. This garter stitch scarf is a testament to your newfound skills. Furthermore, it’s a great example of what you can achieve with a solid beginner knitting guide.
Beyond the Garter Stitch: The Purl Stitch
Once you’re comfortable with the knit stitch, the next fundamental stitch to learn is the purl stitch. Together, the knit and purl stitches form the basis of nearly all knitting patterns. In fact, many intricate designs are simply combinations of these two. Learning to purl will open up a vast world of textures and fabrics.
How to Purl a Stitch:
- Hold the needle with stitches in your left hand and the empty needle in your right hand.
- Bring the working yarn to the front of your work (between the two needles).
- Insert the right needle into the first stitch on the left needle from right to left (the opposite direction of the knit stitch).
- Wrap the working yarn counter-clockwise around the right needle.
- Push the right needle through the stitch, bringing a new loop with it, and slide the old stitch off the left needle.
- Repeat for all stitches.
Practicing both knit and purl stitches will significantly improve your dexterity and understanding of how stitches are formed. Many resources are available to help, including video tutorials that can visually demonstrate these techniques.
Combining Knit and Purl: Stockinette and Rib Stitch
With both knit and purl stitches in your repertoire, you can create more complex fabrics. For example, two common and versatile patterns are the stockinette stitch and the rib stitch.
Stockinette Stitch:
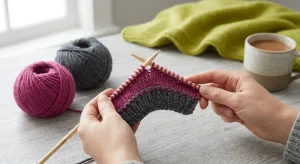
This creates a smooth, V-shaped fabric on one side and a bumpy texture on the other. It’s often used for sweaters and blankets. To knit stockinette stitch, you will: knit all stitches on one row, then purl all stitches on the next row. Repeat these two rows. This creates a fabric that tends to curl at the edges, which is a characteristic to be aware of when planning projects.
Rib Stitch:
Rib stitch creates a stretchy, textured fabric that is perfect for cuffs, hems, and necklines. It’s made by alternating knit and purl stitches within the same row. For example, a 1×1 rib stitch involves knitting one stitch, then purling one stitch, and repeating across the row. On the next row, you would knit the purl stitches and purl the knit stitches. This creates vertical columns of knit and purl stitches. Indeed, the elasticity of rib stitch makes it a favorite for many functional garments.
Common Challenges for New Knitters and How to Overcome Them
Every new knitter faces hurdles. However, with patience and practice, these can be easily overcome. Here are some common issues and their solutions, essential for any effective beginner knitting guide:
- Uneven Tension: This is very common. Your stitches might look too tight or too loose. Practice is key. Try to keep a consistent grip on your yarn. Also, some knitters find that bamboo needles help with tension control.
- Dropping Stitches: Accidentally letting a stitch slip off the needle can be frustrating. If you notice it quickly, you can often pick it up with your needle or a crochet hook. Moreover, using stitch markers can help you keep track of your stitch count.
- Twisted Stitches: This happens when you insert your needle into the stitch incorrectly. Always ensure you’re inserting your needle into the front leg of the stitch for standard knitting.
- Yarn Splitting: Some yarns, especially those with multiple plies, can split when you insert your needle. Try to use a needle with a less blunt tip or practice a gentler insertion.
Remember, knitting is a skill that improves with practice. Don’t be discouraged by mistakes; view them as learning opportunities. Every experienced knitter started exactly where you are now.
The Benefits of Learning to Knit
Beyond creating beautiful handmade items, knitting offers numerous personal benefits. These advantages are often highlighted in any good beginner knitting guide.
- Stress Reduction: The rhythmic motion of knitting can be incredibly meditative and calming, helping to reduce stress and anxiety.
- Improved Focus and Concentration: Following patterns and counting stitches enhances cognitive function.
- Sense of Accomplishment: Completing a project, no matter how small, provides a wonderful feeling of pride and achievement.
- Community and Connection: Knitting is a social craft. Many local and online communities exist where you can share projects, ask for advice, and connect with fellow enthusiasts.
- Creativity and Self-Expression: From choosing yarn colors to designing your own patterns, knitting allows for endless creative expression.
The mental and emotional benefits alone make learning to knit a worthwhile endeavor. Furthermore, it’s a hobby that can be enjoyed at any age and skill level. For instance, many studies have shown the positive impact of crafts on mental well-being. According to a study published by the British Journal of Occupational Therapy, engagement in creative activities like knitting can lead to significant improvements in mood and self-esteem among participants. You can read more about it here.
Caring for Your Knitted Creations
Once you’ve poured your time and effort into creating a beautiful knitted piece, you’ll want it to last. Proper care is essential for maintaining the look and integrity of your projects. Therefore, always check the yarn label for specific washing instructions, as different fibers require different care. Wool, for example, often needs hand washing and flat drying to prevent shrinking or felting. Cotton, on the other hand, can usually be machine washed on a gentle cycle. Blocking, which is the process of wetting and shaping your finished piece, can also significantly improve its drape and appearance. This final step is crucial for giving your handmade items a professional finish. Indeed, understanding yarn care is just as important as mastering the stitches themselves.
Expanding Your Knitting Horizons
As you become more confident with basic stitches and techniques, you might be eager to explore more advanced knitting concepts. There are countless possibilities once you master the fundamentals. For example, you could try knitting in the round using circular needles or double-pointed needles, which is necessary for making seamless hats, socks, and sweaters. Learning to read All You Need to Know About Knitting Patterns and More will also open up a world of complex projects. Colorwork techniques like fair isle or intarsia allow you to create stunning designs with multiple colors. Furthermore, exploring different yarn weights and fiber types will introduce you to new textures and properties. Don’t forget about cabling, lace knitting, and brioche stitch, which add incredible texture and visual interest. The knitting community is vast and supportive, offering endless inspiration and guidance as you grow. This beginner knitting guide is merely the starting point for a lifelong passion.
Conclusion: Your Knitting Journey Begins Now!
Learning to knit is a rewarding experience that combines creativity, mindfulness, and the joy of making. This beginner knitting guide has provided you with the essential steps, from choosing your first supplies to casting on, knitting your first stitches, and even completing a simple scarf. Remember, every stitch is a step forward, and every mistake is an opportunity to learn. Don’t be afraid to experiment, explore, and most importantly, enjoy the process. At Knit n Style, we are committed to supporting your crafting journey with free resources and a welcoming community. So grab your needles and yarn, and embark on this wonderful adventure. Happy knitting!
FAQ:
What supplies do I need to start knitting?
To begin your knitting adventure, you primarily need two things: yarn and knitting needles. For your first project, a smooth, light-colored worsted weight yarn and a pair of straight bamboo or wooden needles (US size 7 or 8 / 4.5 or 5 mm) are highly recommended. These choices make it easier to see your stitches and prevent them from slipping.
How do I make the first loop on my needle?
The first loop on your needle is called a slip knot. You create it by forming a loop with your yarn, pulling a loop of the working yarn through it, and then placing that loop onto your needle. Gently tighten it so it’s secure but still slides easily.
What is the easiest stitch for new knitters?
The garter stitch is widely considered the easiest stitch for new knitters. It’s created by simply knitting every row. This stitch forms a reversible, bumpy fabric and is excellent for practicing consistent tension before moving on to more complex patterns.
How can I fix a dropped stitch?
If you notice a dropped stitch quickly, you can often pick it up using your knitting needle or a crochet hook. Carefully insert the tool into the dropped stitch, making sure to catch the ladder of yarn directly above it, and pull it through to reform the stitch. There are many online tutorials that demonstrate this repair effectively.
Are there any mental health benefits to learning how to knit?
Absolutely! Learning a craft like knitting offers significant mental wellness benefits. The repetitive motion can be meditative, helping to reduce stress and anxiety. It also improves focus, provides a sense of accomplishment, and offers a creative outlet, making it a wonderful activity for overall well-being.