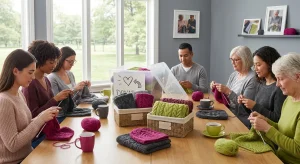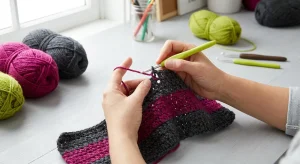
Congratulations, aspiring crafter! You’ve learned the basics, and now it’s time to create your very first finished item. There’s nothing quite like the satisfaction of completing a project, and this easy crochet dishcloth pattern is designed to give you that rewarding feeling quickly and confidently. It’s the perfect beginner-friendly project to practice your chain stitches, single crochet, and turning chains.
The rise in DIY crafting, accounting for 58% of demand, shows a strong desire to create practical, handmade items. A dishcloth isn’t just a practice piece; it’s a useful addition to your home, demonstrating the immediate value of your new skills. Let’s get started on your first masterpiece!
Why a Dishcloth is the Perfect First Project
- Small and Quick: You’ll see results fast, which keeps motivation high.
- Uses Basic Stitches: Reinforces fundamental techniques without introducing complex ones.
- Practical: You’ll have a handmade item you can actually use or gift.
- Forgiving: Small imperfections are charming, not project-ending.
Materials You’ll Need for Your First Crochet Project
Before you begin, gathering your materials is essential. Opting for the right yarn and hook will make your crocheting experience much smoother and more enjoyable. Specifically, cotton yarn is highly recommended for dishcloths due to its absorbency and durability.
- Yarn: 1 skein (approximately 100-120 yards) of worsted weight (medium/Aran/10-ply) 100% cotton yarn. Cotton is absorbent and durable, making it perfect for dishcloths. Consider an organic cotton for a sustainable choice, aligning with current eco-friendly trends.
- Crochet Hook: US H/8 (5.0mm) or I/9 (5.5mm) hook. If you’re unsure which to choose, a 5.0mm is a great starting point for many beginners. For more guidance on selecting the right tools, you might find our article All You Need to Know About Crochet Hooks in One Place helpful.
- Scissors: For cutting yarn. Any sharp pair will do the trick.
- Tapestry Needle: For weaving in ends. This makes your finished project look neat and professional.
Abbreviations Used in This Simple Crochet Project
Understanding abbreviations is a key part of reading any crochet pattern. This particular project uses only a few basic ones, making it very accessible for beginners. Familiarizing yourself with these terms will help you follow along confidently.
- ch: chain
- sc: single crochet
- st(s): stitch(es)
- FO: fasten off
Let’s Crochet Your Easy Dishcloth!
This beginner-friendly pattern uses the single crochet stitch, which creates a dense, sturdy fabric ideal for a dishcloth. Take your time, count your stitches, and enjoy the rhythmic motion of your hook. This is where your practice turns into a tangible item!
Step 1: Making a Slip Knot
Firstly, a slip knot is the foundation of almost every crochet project. It creates the initial loop on your hook.
- Take the tail end of your yarn and make a loop, ensuring the tail is behind the working yarn.
- Insert your crochet hook into the loop.
- Yarn over (wrap the working yarn around your hook from back to front).
- Pull the yarn through the loop on your hook. Gently pull the tail and working yarn to tighten the knot around your hook, but not too tight that it can’t slide.
Step 2: Chain (ch) 26
Next, you’ll create your starting chain, which forms the width of your dishcloth. Consistency here is important for an even edge.
- Yarn over your hook.
- Pull the yarn through the loop on your hook. This creates one chain stitch.
- Repeat this process until you have 26 chain stitches. Ensure your chains are not too tight; they should be easy to work into.
Step 3: Row 1 (Single Crochet)
Now, you’ll begin working your first row of single crochet stitches. This is where your fabric starts to take shape.
- Insert your hook into the second chain from your hook (skip the first chain – this acts as a turning chain).
- Yarn over.
- Pull the yarn through the chain stitch (you now have two loops on your hook).
- Yarn over again.
- Pull the yarn through both loops on your hook. You have just made your first single crochet (sc) stitch!
- Continue making 1 sc in each remaining chain stitch across the row. You should have 25 single crochet stitches at the end of this row.
Step 4: Turning Chain and Subsequent Rows
After completing your first row, you’ll need to turn your work and create a turning chain to begin the next row. This ensures your edges remain straight.
- Turning Chain: Chain 1. This turning chain does not count as a stitch.
- Turn Your Work: Rotate your piece so the back of your previous row is now facing you.
- Row 2 and Beyond: Insert your hook into the first stitch of the previous row (not the turning chain). Make 1 sc in each single crochet stitch across the row. You should still have 25 single crochet stitches in each row.
- Repeat: Continue repeating Step 4 until your dishcloth measures approximately 8 inches (20 cm) square, or until you are happy with its size. This will usually be around 25-30 rows, depending on your tension.
Finishing Your First Handmade Dishcloth
Once your dishcloth has reached the desired size, it’s time to finish it neatly. Fastening off and weaving in ends are crucial steps for a polished look.
Fasten Off (FO)
When you have completed your final row, you will fasten off your yarn.
- Cut your yarn, leaving a tail about 6 inches long.
- Yarn over your hook and pull the cut tail completely through the loop on your hook.
- Pull firmly to secure the knot.
Weave in Ends
Finally, weaving in the ends hides any loose yarn tails, giving your dishcloth a professional finish.
- Thread the yarn tail onto your tapestry needle.
- Carefully weave the needle through several stitches on the wrong side of your fabric. This helps to secure the tail without it unraveling.
- Trim any excess yarn close to the fabric.
- Repeat for the starting tail.
Tips for Success with Your Easy Crochet Dishcloth Pattern
As you work through this project, remember these tips to make your experience even more enjoyable and successful. Learning a new skill takes practice, and these pointers will help you overcome common beginner hurdles.
- Maintain Even Tension: Try to keep your stitches consistent in size. If your stitches are too tight, they will be difficult to work into. If they are too loose, your fabric might be gappy. Practice makes perfect!
- Count Your Stitches: It’s easy to accidentally add or skip stitches, especially when you’re just starting. Counting your stitches at the end of each row ensures your dishcloth stays rectangular.
- Don’t Be Afraid to Start Over: If you make a mistake, it’s okay to undo a few rows or even the whole thing. This is called