For many knitters, the moment you transition from basic stitches to tackling your first pattern can feel like stepping into a new language. Abbreviations, symbols, and intricate instructions might initially seem overwhelming. However, with a little guidance, you’ll soon understand knitting patterns with ease. Here at Knit n Style, we believe every crafter deserves to feel confident in their skills. In addition, this includes deciphering even the most complex designs. This guide will break down the essentials, empowering you to read, interpret, and troubleshoot your way to beautiful finished projects.
Decoding Common Pattern Language
Knitting and crochet patterns use a universal shorthand to keep instructions concise. Familiarizing yourself with these common abbreviations is the first step to unlocking pattern success. Therefore, let’s explore the fundamental terms.
Essential Abbreviations to Know
- k: knit
- p: purl
- yo: yarn over (creates a decorative hole, often for lace)
- sl: slip stitch
- pm: place marker
- bo: bind off (finishes a piece of knitting)
- st(s): stitch(es)
- rep: repeat
- WS/RS: wrong side/right side (refers to the public-facing side of your work)
Many patterns will include a key to their specific abbreviations, so always check there first! Pay close attention to parentheses () and brackets []. They indicate sections to be worked together or repeated. For instance, (k1, p1) 5 times means to knit one, purl one, and repeat that sequence five times. Moreover, understanding these conventions helps you accurately follow instructions.
The Art of Increasing and Decreasing Stitches
Shaping your knitting is fundamental to creating garments, accessories, and anything beyond a flat rectangle. This involves adding (increasing) or removing (decreasing) stitches. Consequently, mastering these techniques is crucial for advanced projects.
Simple Increases
- kfb (knit front and back): Knit into the front of a stitch, then knit into the back of the same stitch before slipping it off the needle. This creates a small, often visible bar.
- M1L/M1R (make one left/right): These increases are nearly invisible. They involve picking up the bar between two stitches and knitting into it, either from the front (M1R) or back (M1L) to create a left or right-leaning increase. They are perfect for shaping shoulders or necklines.
- yo (yarn over): While also used for lace, a yarn over can function as an increase by simply wrapping the yarn over your needle. It creates a small hole, which is intentional for eyelet patterns.
Mastering Decreases
- k2tog (knit two together): Knit two stitches together as if they were one. This creates a right-leaning decrease.
- ssk (slip, slip, knit): Slip one stitch knitwise, slip a second stitch knitwise, then insert your left needle into the front of both slipped stitches and knit them together. This creates a left-leaning decrease.
- p2tog (purl two together): Purl two stitches together as if they were one. This is the purl equivalent of k2tog.
Beyond the Basics: Chart Reading and Pattern Schematics
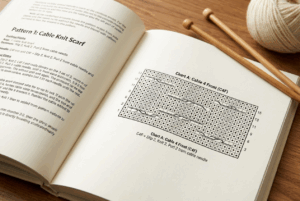
Sometimes, written instructions can be lengthy or complex. Therefore, many designers use charts to visually represent stitch patterns. Learning to read knitting charts will significantly broaden the types of patterns you can tackle. A chart is a grid where each square represents a stitch. Symbols within the squares indicate the type of stitch to be worked. Generally, you read knitting charts from the bottom up, just as you build your fabric. Right-side rows (odd-numbered) are read from right to left, and wrong-side rows (even-numbered) are read from left to right. This mimics how you work across your needles.
Furthermore, charts often come with a legend that defines each symbol. Always refer to this legend, as symbols can vary slightly between designers. For instance, a blank square might mean ‘knit’ on the right side and ‘purl’ on the wrong side, or it might mean ‘no stitch.’ Understanding these visual cues helps you quickly grasp complex stitch repeats. For those who find written instructions cumbersome, charts offer a clear and concise alternative. Consequently, they are a valuable skill for any knitter.
Understanding Pattern Schematics
Many garment patterns include a schematic, which is a diagram showing the finished measurements of each piece. This is incredibly helpful for checking your gauge and ensuring your project will fit as intended. A schematic will typically show the width, length, and sometimes armhole or neckline shaping dimensions. Comparing these measurements to your swatch and work in progress allows you to make adjustments early on, preventing disappointment later. In fact, consistently checking your gauge against the schematic is a hallmark of experienced knitters.
Gauge: Your Key to Success When You Understand Knitting Patterns
Gauge, or tension, is arguably the most critical element in knitting. It refers to the number of stitches and rows per inch (or centimeter) that your knitting produces using a specific yarn and needle size. Ignoring gauge is a common pitfall. As a result, projects can turn out too large, too small, or simply not have the intended drape. Before starting any project, especially garments, always knit a swatch.
Creating and Measuring a Gauge Swatch
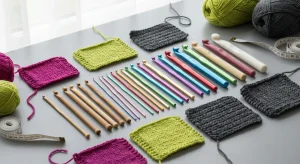
To create a swatch, cast on more stitches than the pattern’s specified gauge (e.g., if the gauge is 20 stitches over 4 inches, cast on 25-30 stitches). Knit several inches in the pattern’s suggested stitch (often stockinette for gauge). Block your swatch according to the yarn’s care instructions, as blocking can significantly alter fabric dimensions. Once dry, place a ruler over your swatch and count the stitches and rows within a 1-inch or 4-inch square. Compare these numbers to the pattern’s stated gauge. If you have too many stitches per inch, your gauge is too tight; try a larger needle. If you have too few, your gauge is too loose; try a smaller needle. This diligent practice ensures your finished item will match the designer’s vision and fit properly. Ultimately, it helps you to truly understand knitting patterns and achieve professional results.
Troubleshooting Common Pattern Hurdles
Even experienced knitters encounter challenges. Don’t be discouraged if you find yourself confused or making mistakes. Learning to troubleshoot is an essential part of the crafting journey. Here are some common issues and how to approach them:
Lost Your Place?
It’s easy to lose track of where you are in a complex pattern, particularly with lace or cable designs. Use stitch markers to delineate repeat sections. Consider using a row counter, or even a simple pencil and paper to tick off rows as you complete them. Many knitters find that printing out the pattern and highlighting completed sections is helpful. Furthermore, taking detailed notes on your pattern can save you time and frustration later.
Stitches Don’t Add Up?
If your stitch count is off, you’ve likely either accidentally increased or decreased a stitch. Carefully examine your work. Look for extra yarn overs (accidental increases) or stitches that look like two were worked as one (accidental decreases). Sometimes, a dropped stitch can also throw off your count. Learning to identify and fix common mistakes, such as a dropped stitch, is a valuable skill. For guidance on foundational stitches, you might find our article on Knitting Stitches for Beginners – The Best Place to Start helpful.
Pattern Terminology Confusion?
If an abbreviation or instruction isn’t clear, first check the pattern’s specific abbreviation key. If it’s still unclear, a quick online search can often clarify standard knitting terminology. Reputable knitting resources like Ravelry or KnittingHelp.com offer extensive glossaries and video tutorials. Don’t hesitate to seek clarification; the knitting community is vast and supportive. This proactive approach will help you to better understand knitting patterns.
Choosing the Right Yarn and Needles
The pattern will almost always specify a recommended yarn weight and fiber content, as well as a suggested needle size. Adhering to these recommendations is crucial for achieving the intended look and feel of the finished project. Different yarn fibers behave differently; for example, wool has elasticity and warmth, while cotton offers breathability and drape. Similarly, needle materials (wood, metal, plastic) and types (straight, circular, double-pointed) all influence the knitting experience and the resulting fabric. For insights into selecting the right tools, our guide You won’t Get Far with Your Next Project Without the Best Set of Knitting Needles provides excellent advice.
Substituting Yarn
While it’s often best to use the recommended yarn, sometimes you might want to substitute due to cost, availability, or personal preference. When substituting, prioritize matching the yarn weight (e.g., worsted, DK, fingering) and achieving the correct gauge. Even if the weight is similar, different fibers can affect drape and stitch definition. Always swatch with your chosen substitute yarn to ensure it works well with the pattern and meets the gauge requirements. This careful consideration ensures your project turns out beautifully, helping you to truly understand knitting patterns and their requirements.
Organizing Your Knitting Projects
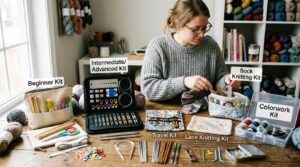
Keeping your projects organized can significantly reduce stress and help you stay on track. This is especially true when working on larger or more complex items. Consider using project bags for each work in progress, keeping all necessary notions (needles, markers, scissors, pattern) together. Furthermore, digital tools like Ravelry’s project pages allow you to store pattern notes, yarn details, and photos, creating a valuable record of your crafting journey. Maintaining an organized workspace not only makes knitting more enjoyable but also helps you efficiently understand knitting patterns and manage multiple projects. In fact, a tidy setup can boost your productivity.
Embracing the Journey
Learning to understand knitting patterns is a continuous journey. Each new pattern presents an opportunity to learn a new technique, decipher a different designer’s style, or work with an unfamiliar yarn. Don’t be afraid to challenge yourself. Start with simpler patterns and gradually work your way up to more intricate designs. Every stitch you knit, every mistake you fix, and every pattern you complete adds to your knowledge and confidence. Remember, knitting is meant to be an enjoyable and rewarding craft. There is no single